In this article, we'll go over:
- Complimentary or discount tickets
- Ticket Sale, Paid by Check
- How to turn off ticket sales
Creating Complimentary or Discount Tickets
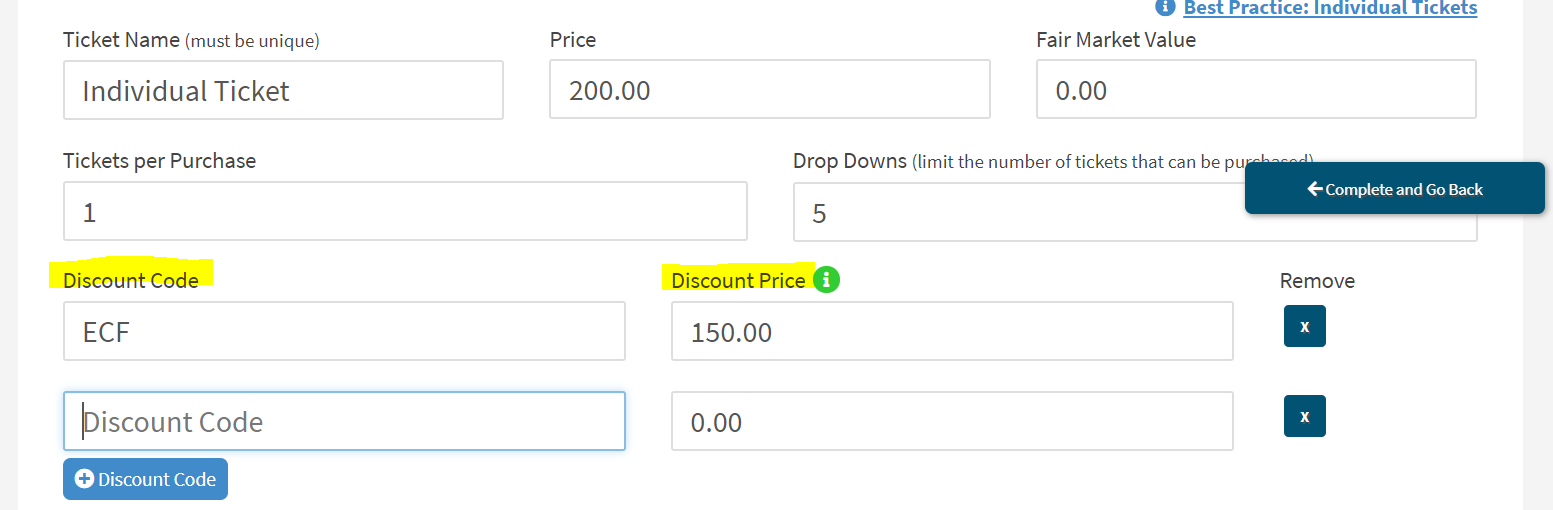
Go to Event Tickets > Modify Tickets. Click on the ticket you want to add a discount code to.
- Go to the Discount Code box and type in the code you wish to use
- Go to Discount Price and enter the amount you are charging after the discount (not the amount discounted). You can add multiple discount codes by clicking "add discount.
For example, in the image below, the code EFC is taking $50 off the price of $200, for a total of $150 after the code is applied.

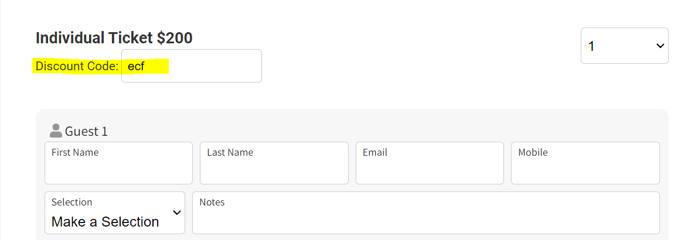
This is what the code will look like on the ticket page:
Turning Off Ticket Sales
Go to Event Tickets > Modify Tickets > Click On Ticket Name > Mark as sold out > Yes. You can also add a sold-out message that will appear on the ticket page.
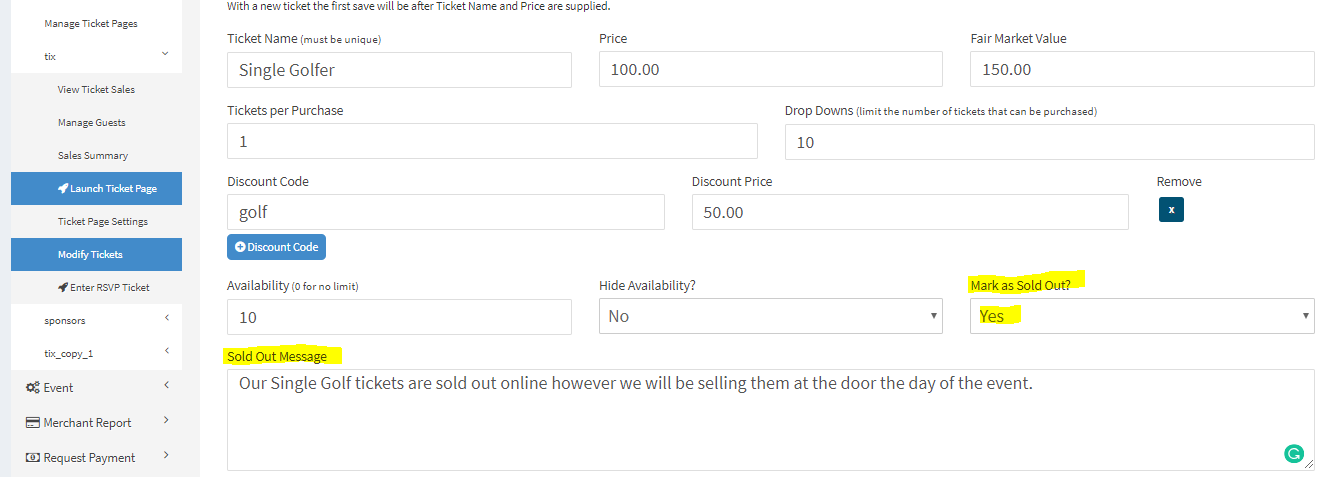
To view what your message looks like, navigate to Event Tickets > Launch Ticket Page. You can also see what this looks like below:

* Once you create a Ticket/Sponsorship/Underwriting and a purchase or sale has been made, do not change the name of the ticket. If you change the name after a purchase has been made, your reports may not be correct, and the resent guest link will not come up.
Ticket Sales Paid by Check
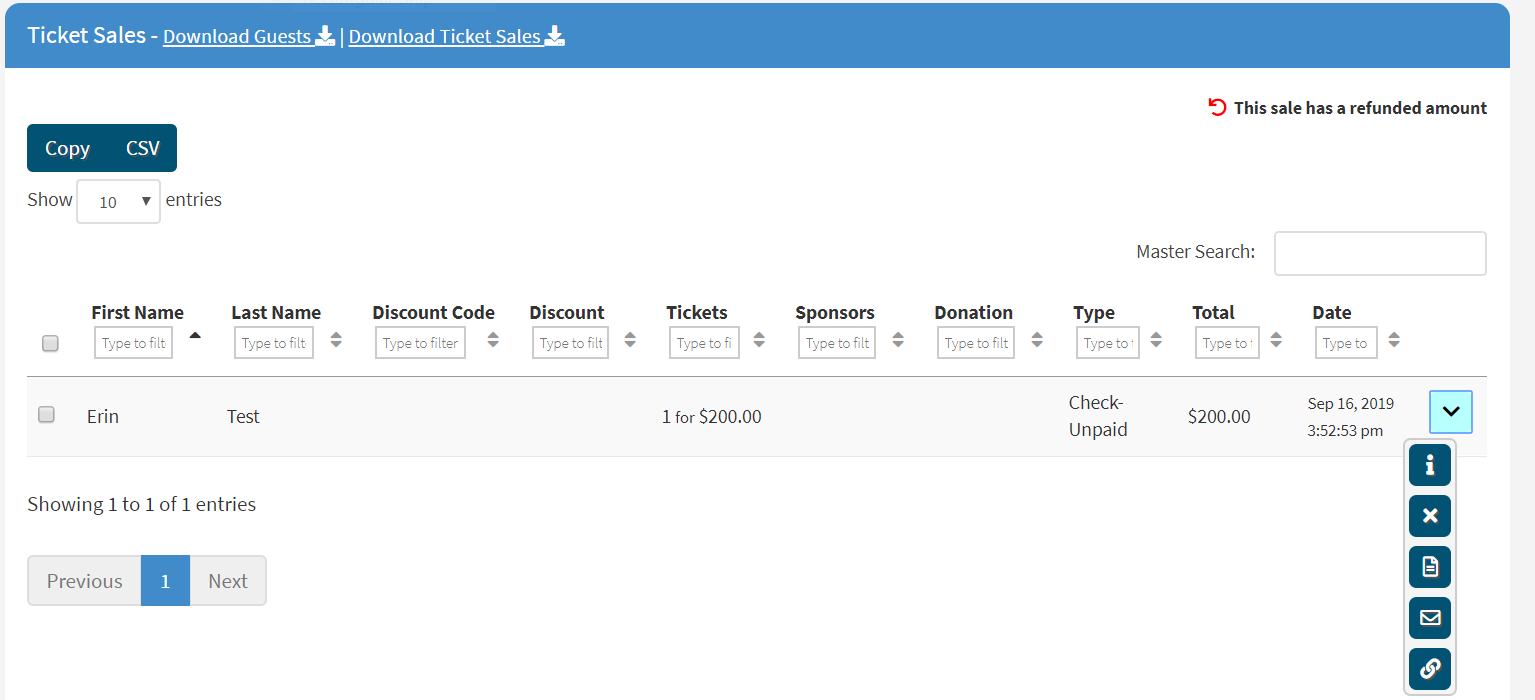
- Once payment has been received, click on the down arrow to the right of the ticket purchaser's record. Click on the "i" and mark "Paid" under Additional Details. Refresh page.
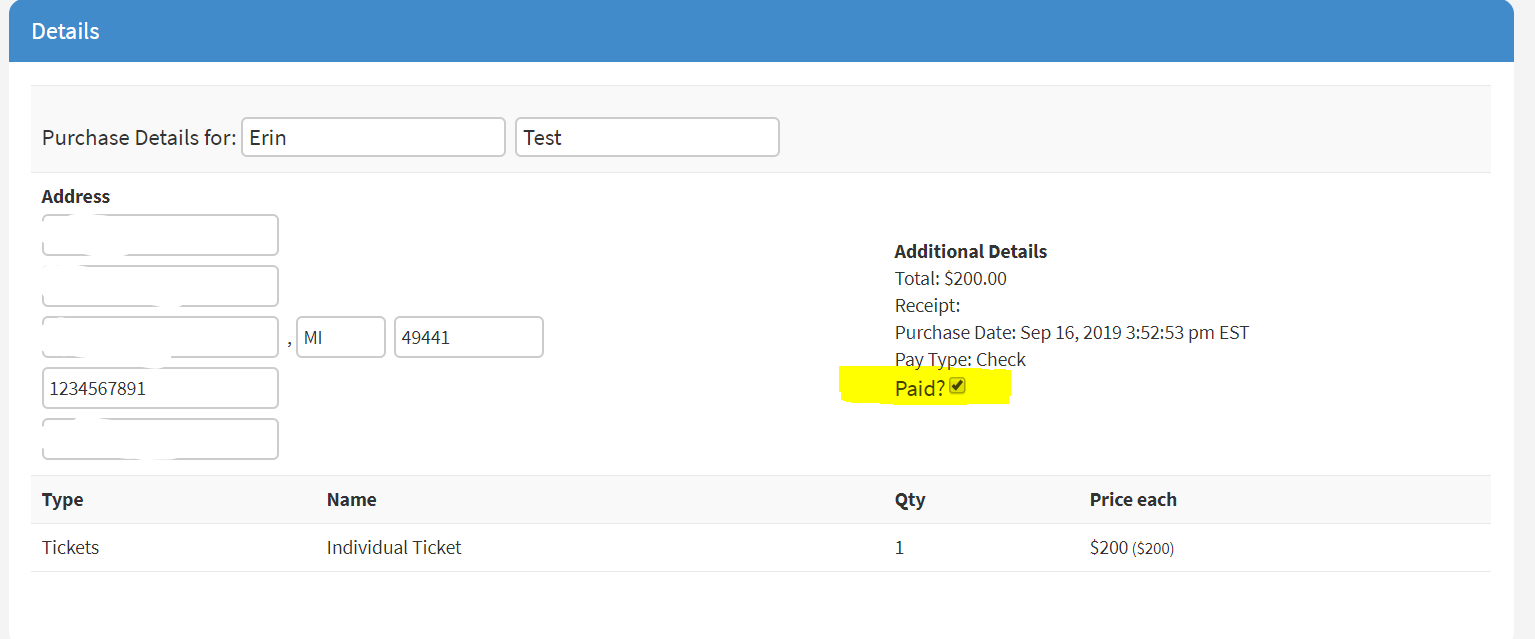
Once the page is refreshed, the type will change from "Check-unpaid" to "Check-Paid"