With ClickBid's recent update, there is no longer the need to "archive". You will now have the ability to mark events as inactive but still be able to access all previous information within the individual events.
1) Once your event has concluded and all unpaid checkouts have been processed, go to the Organizations tab.
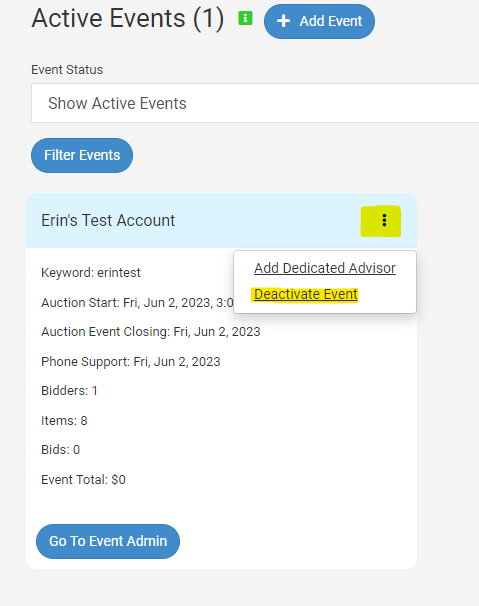
2) Click on the 3 dots to the right of the event name to bring up a drop down. Click on the "deactivate" option.
Note: Once an event has been deactivated, the action cannot be undone.
3) Once the event has been deactivated, you will be able to filter through the inactive events with the "Event Status" dropdown. Inactive events will appear in grey.

4) The "Go to Event Admin" button will not be removed, as you are still able to go into the event to access all previous information.
Have a few bidders that remain in Unpaid Checkouts? No problem! You are still able to process payment in deactivated events.
Ticket Sales
Ticket sales can be transferred from event to event, but is not necessary to transfer over a ticket page if you would like to create a new one.
You will not be able to archive ticket sales. To delete sales, go to Event Tickets > View Ticket Sales. Select the sales you'd like to delete and perform a Batch Update to remove them.
FAQ’s
With this update, can I still see my previously archived event data?
-
The information previously archived can still be found on the latest event under Software Settings > Connect to Archives.
-
What if I deactivate the wrong event?
-
When creating a new event, you have the ability to copy over all or some data from a previous event, inactive or active. You will essentially be able to make a copy of the event accidentally deactivated.
-
- How do I start my next event after deactivating? Click Here to view our best practice on this.